For those who followed my earlier 500GB “Best of OG Xbox” build – both the blog post and the video – you’ll know just how obsessive that project became. The goal was simple: create the best possible budget-friendly upgrade for the original Xbox.
It included 218 full-length NTSC Xbox titles. Every entry was heavily debated. Hundreds of painful cuts were made and in short: It was tight, it was disciplined and it worked beautifully.
But that discipline came at a cost.
To squeeze everything into the usable ±460GB of space that a typical 500GB SATA hard disk offers under FATX – minus the space required for the system partitions to operate properly – a lot of excellent games had to be sacrificed. Not because they weren’t good, but because something else edged them out, or simply because there was no more room left.
The Big Brother Build
Today, I am showcasing the 1TB build – the natural evolution of that project.
Before we go further, let me clarify something important:
This is still not a full original Xbox set, it is not a chaotic “throw everything on it” collection.
For one, that would never fit on a 1TB drive – the Xbox library is simply too large across its lifespan. Secondly, the full catalog also includes Japanese NTSC exclusives and PAL-only releases across Europe and Australia, while this 1TB build – just like the previous one – focuses exclusively on NTSC titles so that every game can be played without having to manually switch video modes.
This 1TB build is something different.
It is a more complete, less painful, deeply curated expansion of the original idea.
Where the 500GB build was designed around the absolute best value and most commonly available SATA upgrade, the 1TB version represents a proper, more expansive “Best of Xbox” collection with enough room to include all the absolute bangers!
What This 1TB Build Includes
This setup features:
- 430 full NTSC Xbox titles
- All 218 games from the 500GB build
- 202 additional Xbox titles
- 420 games in CCI format (Cerbios Compressed Image)
- 10 games in DVD transfer or ISO format
- 500+ arcade games via CoinOPS Ninja Gold
In other words, this is the big brother build.
Where the 500GB version works well for tight spaces but often felt like battlefield triage under pressure, this one feels confident – balanced – complete!
It remains curated, separating the treasures from the rest. It’s important to note that this is still not the full NTSC library, but careful sorting and genre balance were still key priorities.
Cerbios & CCI – The Foundation
Just like the smaller build, this project runs on a hard-modded Xbox (either modchip or TSOP flashed) with Cerbios V3.1, which, of course, includes full CCI format support.
The CCI (Cerbios Compressed Image) format is what makes it possible to fit 430 original Xbox games plus bonus arcade content on a single 1TB drive – something that was simply impossible until recently. Cerbios brought a host of new capabilities to the original Xbox, including CCI support and compatibility with drives up to 16TB.
So what’s the formula here?
Out of the 430 games, 420 are in CCI format (the 218 from the prior build plus 202 additional titles), and 10 are in ISO or DVD transfer format. And yes, while CCI covers roughly 99% of the library, a few titles still require exception formats to work properly.
Important Note:
As a collector, I do own the full original Xbox collection on physical media myself. And while I strongly encourage collecting original games where possible, I’m also aware that I was fortunate enough to start years ago – before prices on many of the rarer titles exploded (some of which are now extremely difficult to even find).
Even with such a collection, I personally enjoy the kiosk-style view that XBMC4Gamers offers. It’s simply more inviting to play. With the original Xbox as a solid centerpiece in the heart of my living room, being able to power it on, browse visually, and jump straight into a game makes the experience far more enjoyable – whether that’s for ten minutes or for hours.
Large CCI collections do exist in the usual torrent locations online, including sets that allow you to select individual titles – but as always, I will not be pointing anyone toward specific sources. Emulation and backup distribution sit in a legal grey area, and that’s not the focus here.
In short, this post is about structure, experience, and modernization. It’s an example of how I spent a week carefully curating a refined library – not a tutorial on where to obtain the files.
What 1TB Allowed Me to Fix
The 500GB build was extremely tight. It contained the absolute heavy hitters across every genre, but that also meant cutting many genuinely great titles – games were removed because..
- A competitor scored 0.1% higher.
- Two similar games released at the same time and one edged out the other.
- Often only one entry in a series could survive.
- FPS titles had to be aggressively reduced to avoid swamping the drive.
- Sports titles were limited to only the strongest yearly entries.
- Some older or newer installments had to give way to the “most iconic” release.
With 1TB, much of that compromise disappears. More complete series can coexist, and strong runners-up finally have room. Genres like FPS can breathe without dominating the drive, expansions are included where applicable, and close-call competitors no longer automatically lose their place.
But make no mistake – this is still a curated collection. Even at 430 titles, triage was necessary, and yes, I went through the entire library painstakingly, title by title, to make this selection intentionally.
Organization & User Experience
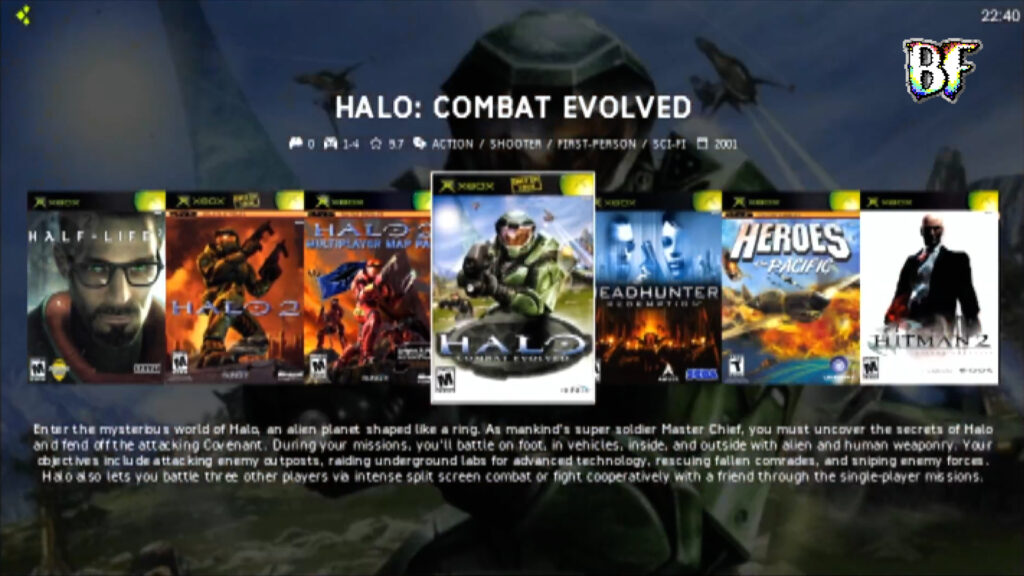
Structurally, this build uses the same foundation as the 500GB version, with XBMC4Gamers running in kiosk mode, custom scene-made artwork, and a clean, gamer-friendly layout.
My goal has never been to “scroll through a massive text list,” but rather to create a truly gamer-focused experience – for visiting friends and family, but also for myself, as I wanted to make 2026 a year where I can enjoy gameplay more, not just when playtesting repaired consoles.
Now, I can simply turn on the Xbox, visually pick a game, and start playing. Whether it’s a quick 20-minute session or a multi-hour grind to progress through a story, the interface makes browsing and selecting games genuinely enjoyable.
Even with 430 Xbox games and 500+ arcade titles, the library feels intentional rather than overwhelming. Although I have multiple Xboxes at home across 500GB, 1TB, and 2TB builds, it is the 1TB build that remains permanently hooked up to my television.
Arcade Integration – CoinOPS Ninja Gold
This build also includes CoinOps Ninja Gold, a 500+ title collection of emulated arcade and older-generation systems presented in a similarly user-friendly style to XBMC4Gamers. It can be launched directly from the games menu, making it feel like a natural extension of the main library rather than a separate add-on.
I included it because the 1TB build had just enough storage space left to accommodate this 11.8GB collection – space that would otherwise have been spent squeezing in two or three additional Xbox titles that, in my opinion, simply didn’t earn their place in the 1TB lineup.
The above video is not mine.
Will this replace my collection of classic consoles? Absolutely not. The discussion of original hardware versus the impressive range of emulators the original Xbox can run deserves its own dedicated video and blog post – and spoiler alert, those are coming soon.
That said, having 500+ arcade games built in hits a perfect sweet spot for quick, accessible fun – especially when friends or family are visiting. It captures that familiar feeling of the arcade machine tucked into the corner of a local sports club or cafeteria: easy to jump into and perfect for a quick play.
Hardware & Software Setup (Hard-Mod Focused)
Please note that both of my builds are specifically intended as examples of what you can compile for hard-modded original Xbox systems – whether via modchip or TSOP flash – running Cerbios.
I have deep respect for the softmod scene and the incredible work done by developers like Rocky5 and Harcroft. Their contributions have kept the Xbox scene alive and accessible. However, that focus has also meant there is far less modern, structured documentation aimed specifically at hard-mod users who may want to migrate to a modern 2026 Cerbios-based setup.
That’s the gap I’m trying to help fill — both here and in the extensive 100+ page guide I’m currently writing, alongside the accompanying video series. There are still many Xbox owners with hard-modded systems who can meaningfully upgrade their existing machines and rediscover what the original Xbox is capable of.
That doesn’t mean this curated game selection won’t be useful for softmod users. It simply means that setting up the collection comes with different considerations, trade-offs, and limitations on a softmodded machine. For more detailed guidance on softmod setups, I highly recommend the videos by MrMario.
Tools & Components Used:
- BIOS: Cerbios V3.1
- Drive Formatting: FATXplorer by Eaton
- Base HDD Images: Pre-built C & E images from Hazeno (modified for Cerbios V3.x)
- SATA Adapter: JP103-5 IDE-to-SATA adapter (for other adapters see here)
- IDE Cable: 80-wire IDE cable (recommended)
- Hard Drives: Standard 500GB & 1TB SATA drives*
*7200 RPM drives are generally preferred today, as they are often just as inexpensive on the second-hand market as their 5400 RPM counterparts. That said, 5400 RPM drives are perfectly fine to use as well.
Building It Yourself
I personally use FATXplorer in almost everything I do with the original Xbox, especially for its core formatting functionality, which is available in the free version for Xbox enthusiasts.
And yes, you can absolutely build these images using the free version of FATXplorer, combined with FTP transfers from your PC or laptop to your Xbox. However, it is worth pointing out that FATXplorer offers far more functionality beyond that.

Transferring 500GB or 1TB over FTP takes a significant amount of time. There are much faster ways to get the job done, which is why I strongly recommend purchasing a full FATXplorer license. The full version allows you to directly mount Xbox hard drives on your PC or laptop.
The time savings are enormous. Instead of relying on FTP speeds, you can simply copy and paste files as if the drive were any other disk connected to your system – transferring at the full speed of the drive itself and potentially saving hours, or even days, of waiting.
Full Game List + File Sizes (Public Spreadsheet)
To make your own build more plannable and customizable, I’ve created a Google Sheet that shows exactly which titles are included in each build – and, more importantly, the file size of every game so you can accurately calculate how much space you’ll be putting onto your hard drive.
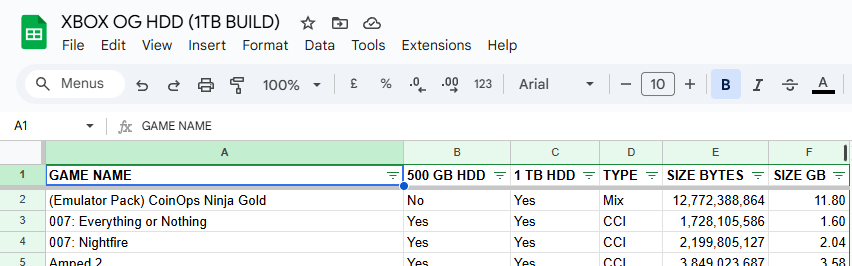
The sheet is available here, and it makes it incredibly easy to plan and adjust your own build – especially if you want to check whether your personal favorites fit on a 500GB drive or would push you over capacity.
Especially with CCI sizes varying widely, having exact file size data removes the guesswork.
From 500GB to 1TB (and What’s Next)
Yes, you guessed it – a 2TB build is on the horizon. It’s hard to ignore, especially since that version is already floating around in torrents, containing what is essentially the full library. But where’s the fun in that if you don’t add a few surprises along the way?
For now, here’s the reality behind the 500GB and 1TB builds.
In terms of budget, 500GB SATA drives are unbeatable. You can still find them for just a few dollars. They were the standard for PCs and laptops for years, and with everything moving to SSDs, very few people are thinking, “Let me grab a 500GB SATA disk for backups.”
When it comes to storage value, 1TB SATA drives hit the sweet spot. While they initially emerged as the natural step up from 500GB, the rise of SSDs shifted the market, pushing 500GB disks further out of circulation – especially in the 2.5″ laptop form factor. Today, 1TB drives remain widely available second-hand at very reasonable prices, making them perfect for a curated Xbox build.
And what about 2TB drives? They’re ideal if you’re chasing completeness, but they are more expensive, fewer people have unused 2TB disks sitting around, and second-hand pricing doesn’t always favor them compared to buying a new large-capacity drive.
Besides, did I mention yet that Cerbios supports up to 16TB? Just sayin’..
And an Emulator-Only Build?
Recently, my eye caught a slightly older but very impressive 500GB image floating around online, known as the Dragon Loaded 2024. This curated collection is focused entirely on turning the Xbox into a retro emulator powerhouse.
The Dragon transforms an Xbox into a dedicated retro emulator machine, covering microcomputers and consoles all the way up through PS1 and N64. It’s already proving very popular, which is why I’ll be covering it in a separate video soon.
The reason for a dedicated video is simple: it’s a 2024 build and, as such, isn’t yet fully compatible with Cerbios V3.0 or higher. Changes in Cerbios 3.x moved the cerbios.ini file – which controls some of the BIOS settings – to the E:\ drive of the Xbox.
It’s an easy fix if you know what you’re doing, but not everyone does. That’s exactly why I’ll make a step-by-step video showing how to get this excellent Dragon 2024 image running on a Cerbios-powered Xbox, so anyone who wants to use it can do so without headaches.
Wrapping It Up
And that’s a wrap – unless you were scrolling through the post and missed the section covering the full list of titles for the 1TB build, which you can find here,
The 500GB build was disciplined; the 1TB build is confident. It follows the same philosophy but removes much of the painful compromise, allowing deeper genre representation, fuller series coverage, and far fewer “I wish that made it” moments – all without feeling bloated.
Turn it on. Pick a game. Play.
Put the original Xbox back where it belongs – at the heart of your living room.
Thanks for following along, and I’ll see you in the near future!
For those who missed it, here’s the link to the 500GB “Best of OG Xbox” build